DHT11/DHT22
Environment - DHT11/12/22 SONOFF2301/7021 NORMAL

Introduction
DHT11 and its sibling DHT22 are temperature and humidity sensors which using a custom 1-wire protocol. That means that they are not compatible with the same 1-wire bus as standard 1-wire units.
- Specifications:
Temperature (-40C to +85C)
Humidity (0-100 % rel. humidity)
Wiring
The DHT sensor needs to be connected to a configurable GPIO on the ESP module. In case you have a simple ESP-01 module, it’s best to use the GPIO-2 pin.

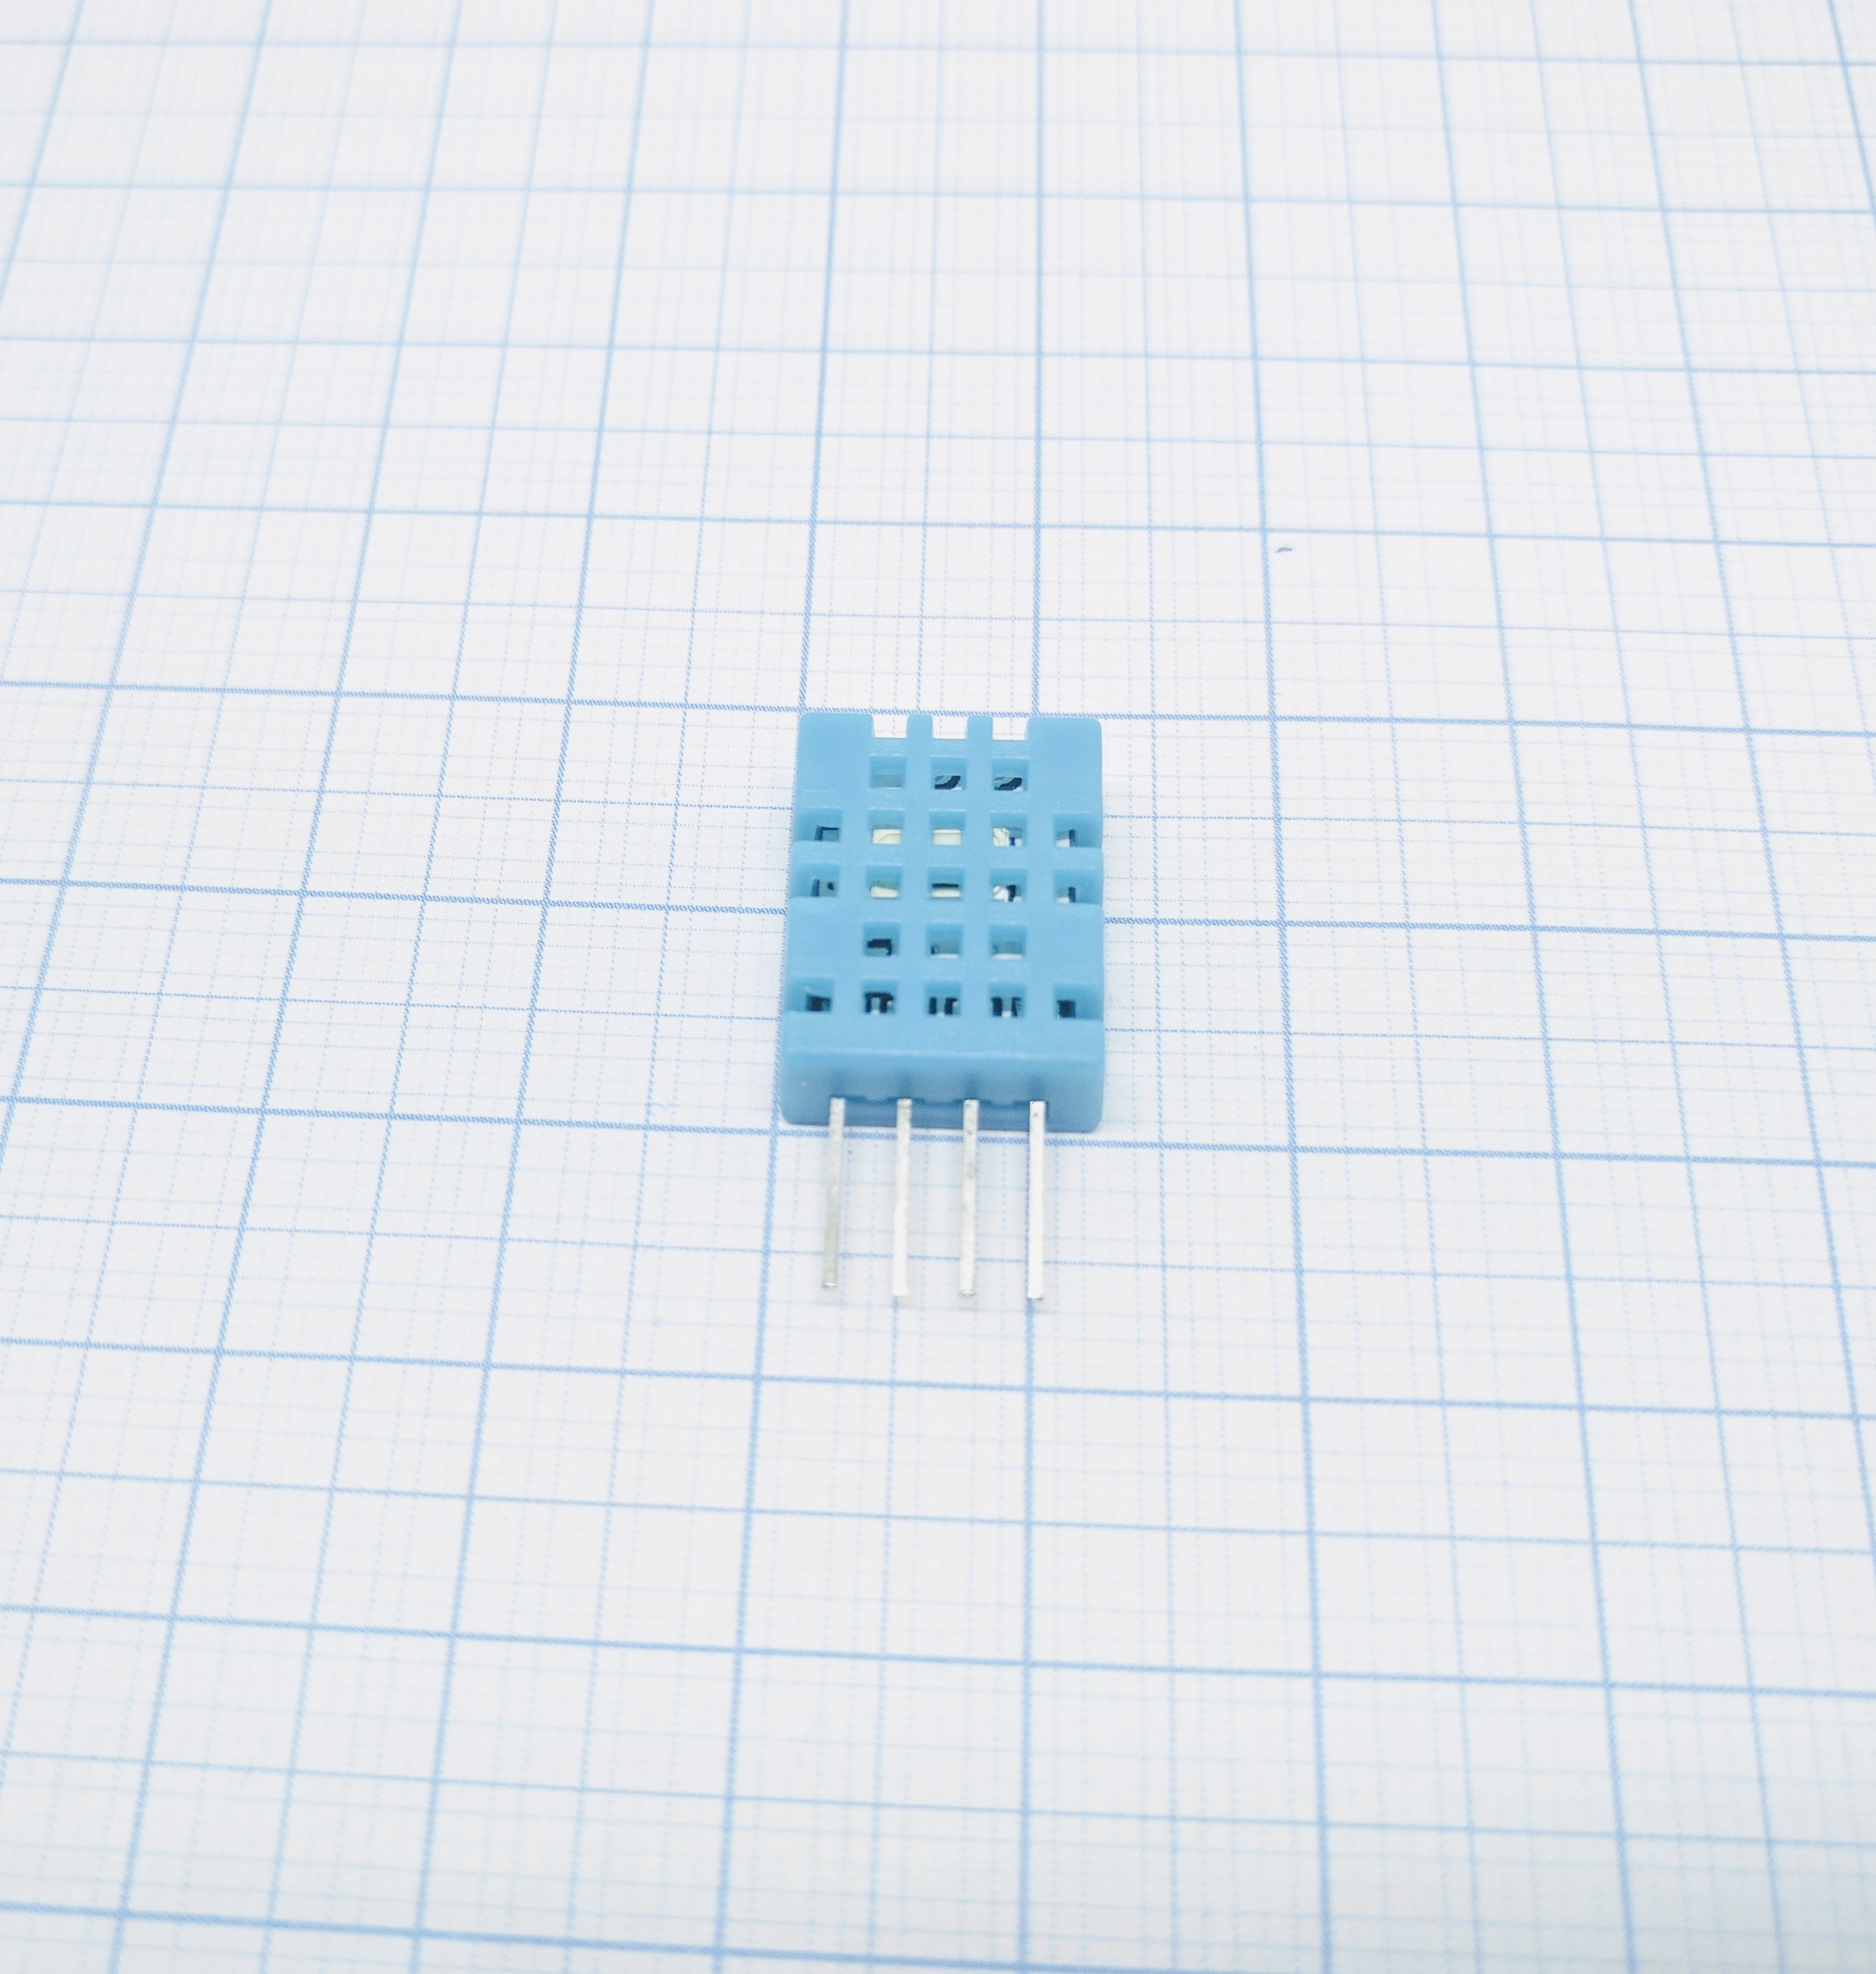
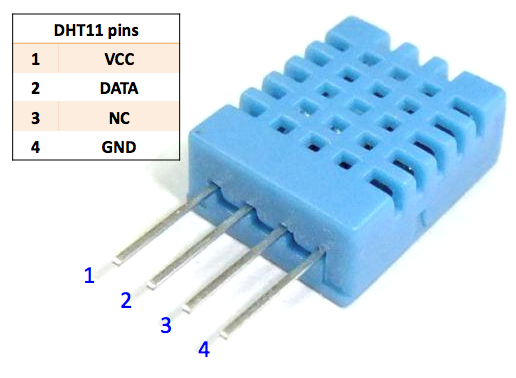
DHT11 (blue)

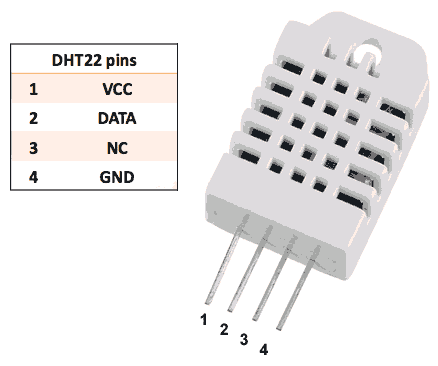
DHT22 (white)
ESP               DHT11/DHT22
GPIO (X)   <-->   Data (2nd pin)

Power
5.0V       <-->   VCC (1st pin)
GND        <-->   GND (4th pin)
Note
Do not use GPIO 15 as an input for the DHT11/22. During startup of the
ESP8266, this pin must be LOW for proper operation. It is good to
avoid using GPIO 0 as an input as well. This pin must be HIGHT at
startup, unless program mode is required. The data pin of the DHT11/22
needs a pull-up resistor. A value of 4.7k - 10k proves to be sufficient.
Setup

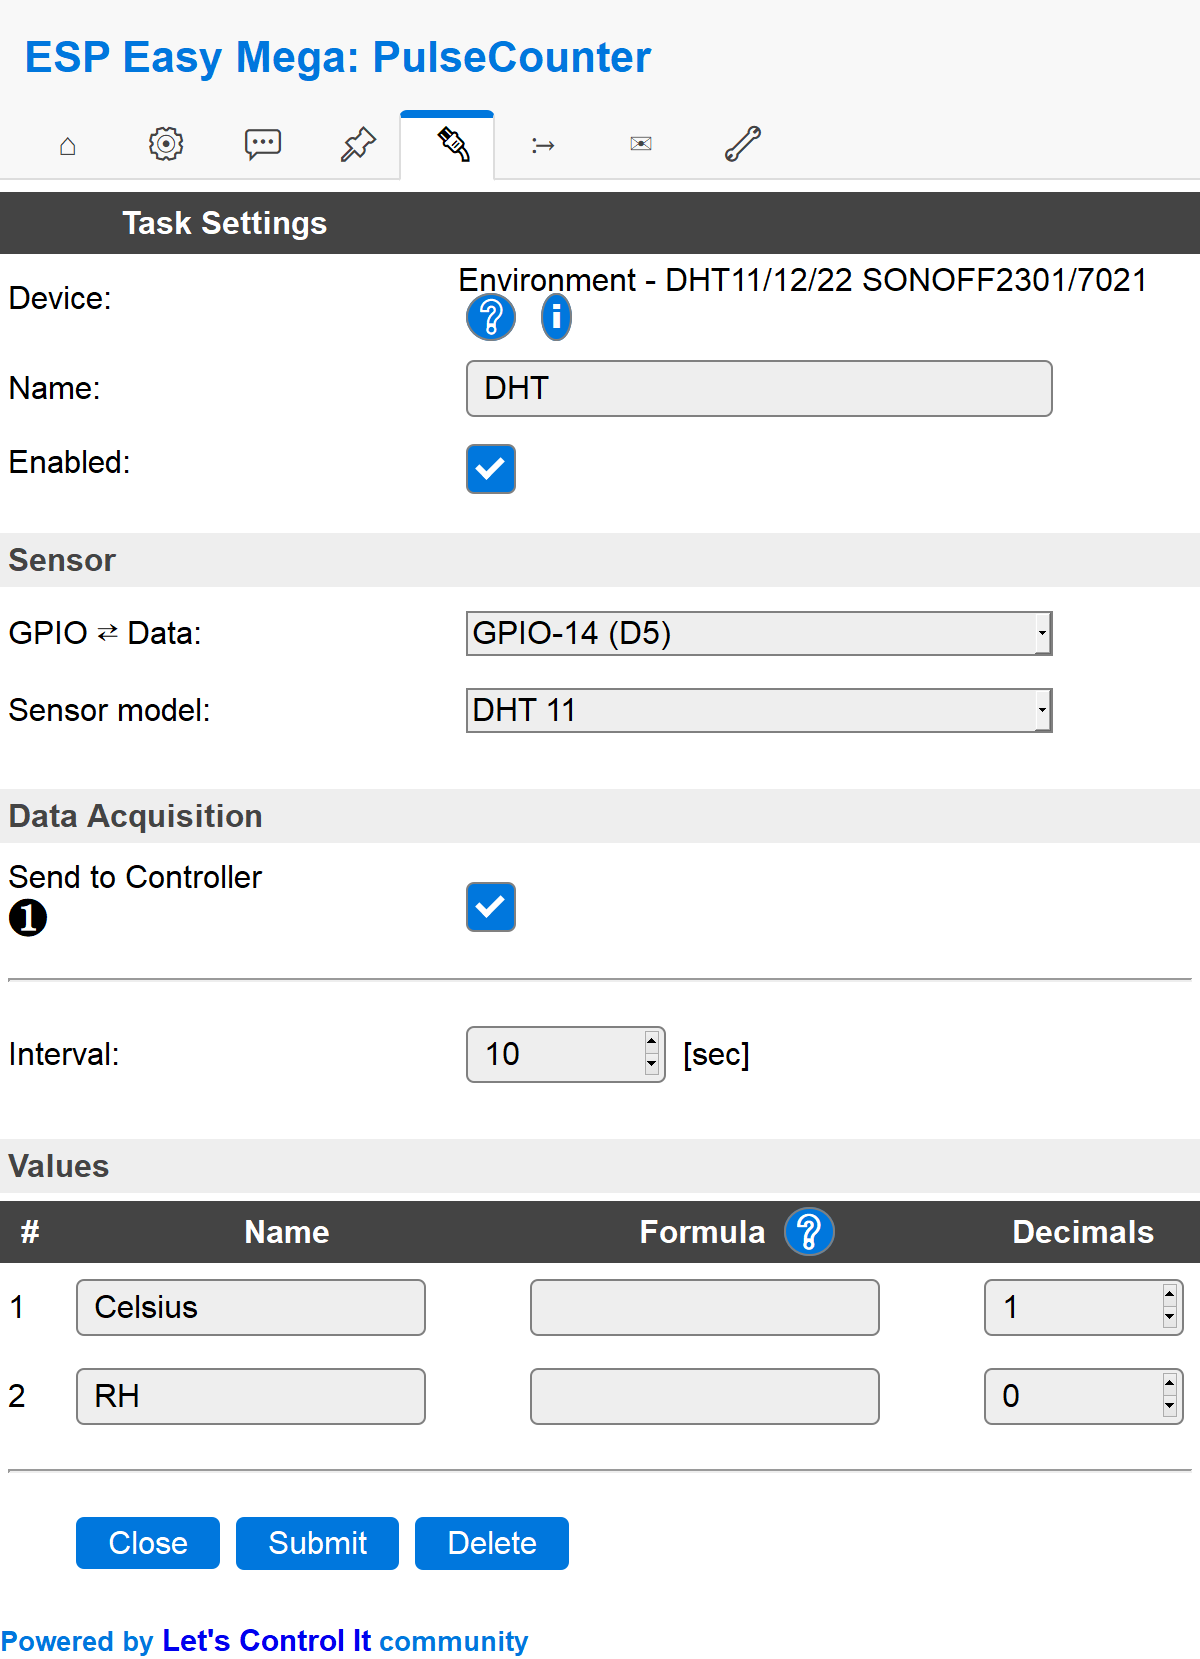
Task settings
Device: Name of plugin
Name: Name of the task (example name DHT)
Enable: Should the task be enabled or not
Sensor
GPIO <–> Data: Pulse input is generally set to GPIO 14 (D5).
Sensor model: Pick your sensor model, either DHT11 or DHT22.
Data acquisition
Send to controller 1..3: Check which controller (if any) you want to publish to. All or no controller can be used.
Interval: How often should the task publish its value (5..15 seconds is normal).
Indicators (recommended settings)
Indicator |
Value Name |
Interval |
Decimals |
Extra information |
|---|---|---|---|---|
Temperature |
Celsius |
10 |
1 |
|
Humidity |
RH |
10 |
1 |
Rules examples
On DHT#Celsius Do
 If [DHT#Celsius]>-15
   NeoPixelAll,255,0,0 //Red light
 Else
   NeoPixelAll,0,255,0 //Green light
 EndIf
EndOn
How to patch Wemos DHT shield
The Wemos DHT shield uses a pin which is also toggled at boot disrupting the connected DHT22 sensor.
This causes the sensor to become unresponsive after a reboot.
The DHT sensor needs to be connected to a configurable GPIO on the ESP module. In case you have a simple ESP-01 module, it’s best to use the GPIO-2 pin.
See this elaborate post on GitHub describing the problem and how to patch the board to make it work like it should.
Where to buy
Store |
Link |
|---|---|
AliExpress |
|
Banggood |
|
eBay |
$ = affiliate links which will give us some money to keep this project running, thank you for using those.
